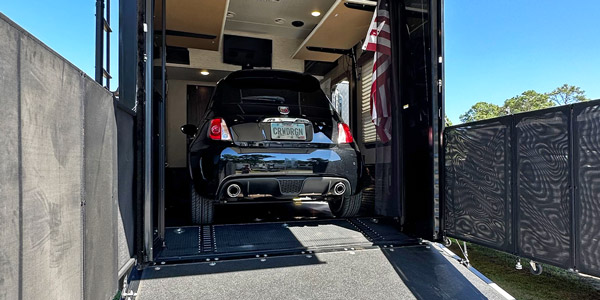
Learn all about how we picked out a daily driver for our full time RV living setup + how we successfully load and carry it inside the back of our fifth wheel RV.
We’ve been traveling with this little clown car for 4 years now and it’s been a blast exploring thousands of miles of tight city streets, winding mountain roads, wide-open interstates, and flat coastal highways. But why did we choose this particular vehicle in the first place? And how do we safely load and haul it?
OUR OPTIONS
In the beginning, we considered hauling a motorcycle, UTV or some other cool toy (and we probably would have if this was our vacation rig) but considering we’d be living with this setup full-time, we really wanted a vehicle we could drive at highway speeds for hours at a time, even in the cold and rain. We also knew we wanted a brand-new vehicle, as that would help eliminate as many potential problems as possible as we adjusted to this huge lifestyle change.
With those things in mind, we looked on Grand Design’s website to see the garage in our RV (2020 Momentum 397TH) was listed at 150 inches so we knew we needed a vehicle shorter than that.
This left us with 4 options:
- Mitsubishi Mirage – 149.4 inches
- Chevy Spark – 143.1 inches
- Fiat 500 – 139.6 inches
- Smart EQ Fortwo – 106.1 inches

At 149.4 inches, the Mirage had less than an inch to spare, which was too close for comfort, so we eliminated that one. The Smart EQ was only available in electric and had a pitiful range of less than 60 miles, so we eliminated that one as well. The Spark seemed like a perfectly nice economy car, but the Fiat just stuck out to us in a way the Chevy didn’t. And that was before we discovered the world of Abarth. So we excitedly hit the road and drove a couple hours to check out an Abarth in person.
THE TEST DRIVE
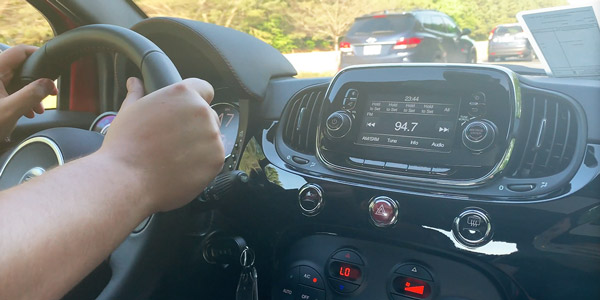
The first thing I needed to do is to see if I could even fit inside this car. And at 6ft 3in – I surprisingly had plenty of leg room. I didn’t even have to put the seat back all the way back. So with that out of the way, it was time to take measurements to confirm the length.
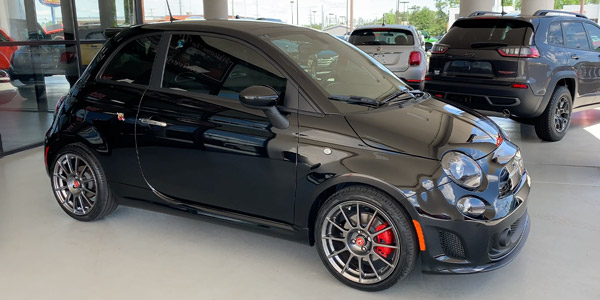
The Abarth ended up being 5 inches longer than a standard 500 (144 inches total) but that still left us with right at 6 inches to spare in the garage, which sounded good enough to me, so we proceeded with a test drive… and that’s when we knew. This was our vehicle.

THE PURCHASE
Before making the purchase, I reached out to Grand Design for weight limits on the ramp door and frame. Our factory rep assured me that the limiting factor was the ramp door, not the frame, and that the door was rated for 3000 pounds. The curb weight of the Fiat 500 Abarth was just over 2500 pounds, so even with me in the driver’s seat, we’d come in comfortably under the 3000-pound limit.
So the decision was made.
After a few weeks of searching for a manual 5-speed model, I found a fully loaded all-black Abarth was in route to a dealer a few hours from us. I negotiated the final price via email and we put down a deposit before it was even delivered.

As soon as we picked it up, I installed a front and back facing dash cam, these Abarth seat belt cushions for my wife’s comfort and then had all the paint corrected and protected with a ceramic coating. I also added this roof rack system, so even when we’re carrying two full size mountain bikes for exploring, we can still swing by a grocery store and go on a full shopping spree. And since I knew we wouldn’t be carrying anyone else, I removed the back seats and threw them in storage. That gave us a slight upgrade in cargo space.

LOADING + SECURING THE CAR
Now that we had the car, the next step was figuring out the best way to load and secure it for travel.
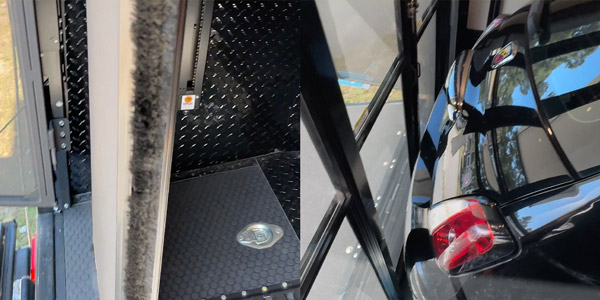
I ultimately decided on a custom E-Track solution mounted to the floor of the garage with 1.25 inch lag bolts and four ratcheting E-Track straps to secure each tire.
At the front we have a 2ft E-Track rail on each side with a moveable e-chock that’s precisely mounted so the front bumper can’t touch the front wall of the garage when the front tire is up against the chock. Behind those E-Track rails are permanently mounted wheel-chocks used for chocking the back of the front tires and for another strap attachment point. Once I drive over the back chock, the tires drop down between both chocks and are secured from rolling forward or back, even before strapping down the tires. Then we have a roller idler on each side which allows the straps and ratchet to sufficiently clear the front bumpers when securing. And then, to secure the rear tires, we have four more 2ft rails. (See video for visual explanation.)
On travel days I simply pull the car in, gently drop the front tires in between the 2 wheel chocks, pull the e-brake, squeeze my way out of the door, strap down all 4 tires, and that’s it!

WE GOT LUCKY
We planned out the fit of the car and the entire E-Track setup well before we took delivery of the RV, which was a little risky, but luckily it all worked out for us.
I say luckily because although we were supposed to have 6 extra inches of length in the garage, it ended up being much less than that because of our 3 season garage doors, which take up additional depth. Our final fit ended up having just an inch or two to spare – so I definitely recommend confirming all of the measurements yourself before wildly making major purchases like we did. YOLOOOOOOOO

I’ll put a link to all of the parts we used for this setup below.

HAVE QUESTIONS?
Drop a comment below or on YouTube and I’ll get back to you as soon as I can.
My name is Chris Dow, this is Around the Sun We Go, and remember… make every trip count.


0 Comments