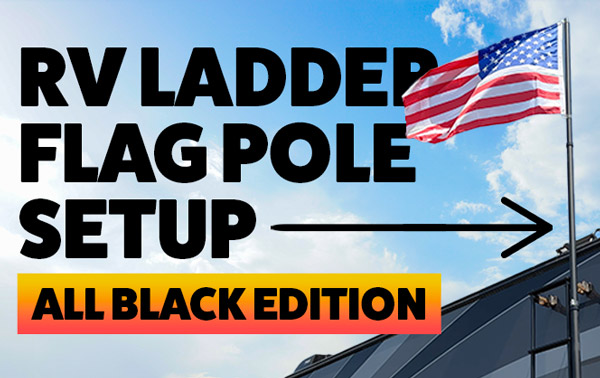
We recently upgraded our silver Harbor Freight flag pole to this all black flag pole kit from Amazon. It seems to be higher quality and matches the aesthetic of our setup so much better – all black everything baby!
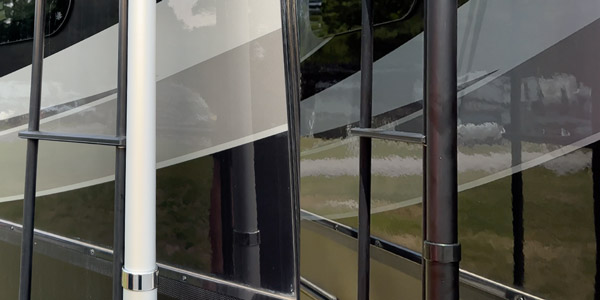
Not only that, but the total cost to completely mount the pole to our RV ladder and illuminate the flag at night was less than $100! Here’s the price breakdown:
Flag Pole Kit $69.90 (see it on Amazon)
+ Hose Clamps $6.99 (see it at Harbor Freight)
+ Solar Spotlight $12.94 (see it at Walmart)
= Subtotal $89.83 + Tax $6.74
= GRAND TOTAL $96.57
FLAG POLE KIT
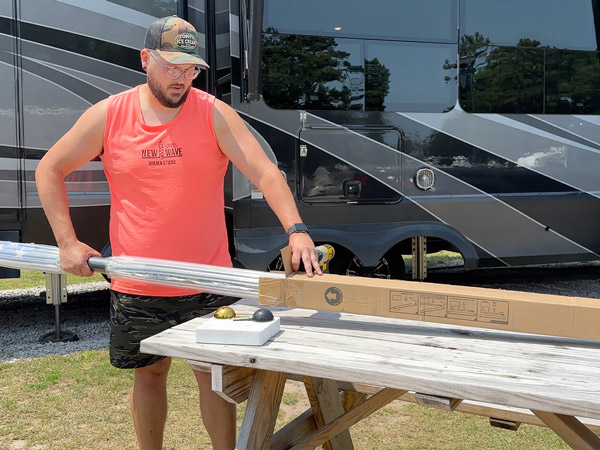
This flag pole kit included:
- 1 Flag Pole
- 1 American Flag (3x5ft)
- 4 Clips to Attach Flags
- 2 Decorative Ball Ornaments*
It arrived quickly, was well packaged and feels higher quality than the Harbor Freight version. It also:
- can accommodate 1 or 2 flags (3x5ft)
- is made from lightweight, rust-proof aluminum
- is easy to setup with a twist to lock/unlock motion
- can extend up to 20 feet in the air
- allows flags to freely rotate around pole the so they’re less likely to tangle
*We didn’t attach the decorative balls to the top of the pole so it’d be easier to quickly raise and lower the pole when secured snug up against the RV ladder.
HOSE CLAMPS
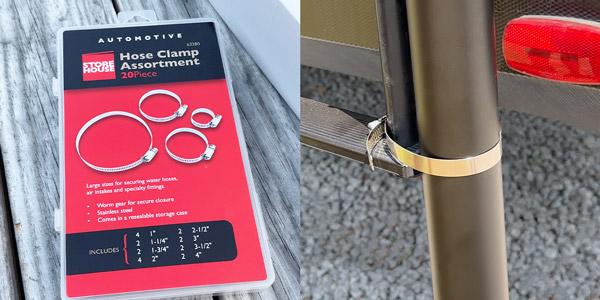
We purchased this cheap pack of hose clamps from Harbor Freight to mount the flag pole to our RV ladder. They’re stainless steel, strong, easy to attach and should hold up pretty well outside in the elements.
SOLAR SPOTLIGHT
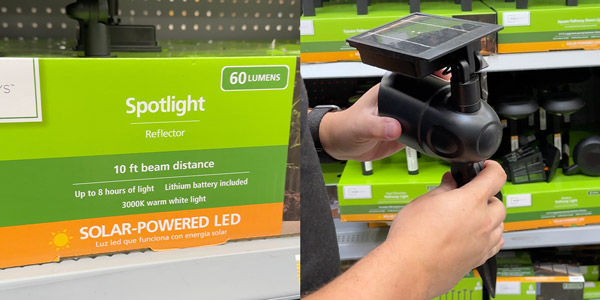
If you’re like us and plan to fly your flag 24/7, it’s customary and considered respectful to make sure your flag stays illuminated at night. For this reason, we purchased this solar spotlight from Walmart. We chose this particular light because:
- it’s solar powered and doesn’t require wiring or battery changes
- it’s adjustable so you can focus the light as needed
- the solar panel is also adjustable so it can get more sun
- it provides up to 8 hours of light after fully charged
- it’s weather-resistant and waterproof
Now that we’d gathered all the items, it was time to set it all up.
FLAG POLE SETUP
1. Position flag pole upright against the RV ladder, making sure it sits level on the ground.
2. Attach flag(s) by using the clips that were included in the flag kit.
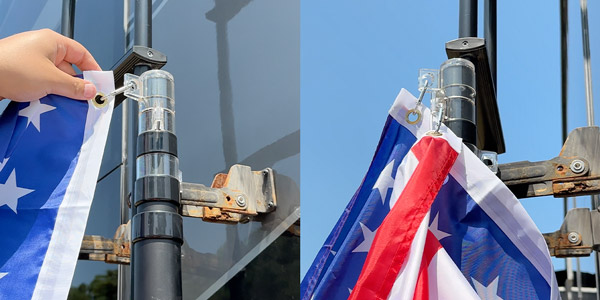
3. Twist the top section of the pole to the left to loosen it. Raise it up as far as it will go, then twist the pole to the right to tighten it. Repeat for all sections. Adjust height as desired.
4. Secure a large hose clamp around the pole and the bottom of the ladder. Don’t overtighten clamp because this could damage your pole.
5. Secure another large hose clamp higher up on the ladder, where it’s still easily accessed. Again, don’t overtighten clamp because this could damage the pole.
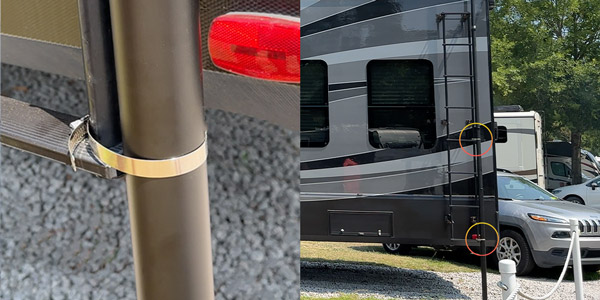
Now that your flag pole is secured against the ladder of your RV, let’s perform an emergency test.
EMERGENCY TEST
Pretend there’s a bad storm coming. It’s already super windy, pouring down rain and you need to take your flag down ASAP. What do you do?
1. Grab the pole section above your top hose clamp, twist to the left to loosen it and let the pole slide down.
2. Repeat until all pole sections above your top hose clamp are lowered and secured.
3. Remove your flag and run back in the RV.
Done! Your pole is still out there, but it’s fully lowered and the flag has been removed so it won’t catch wind during the storm.
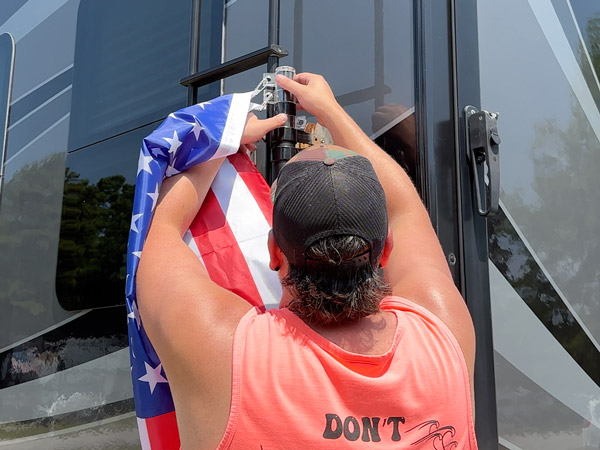
SOLAR LIGHT
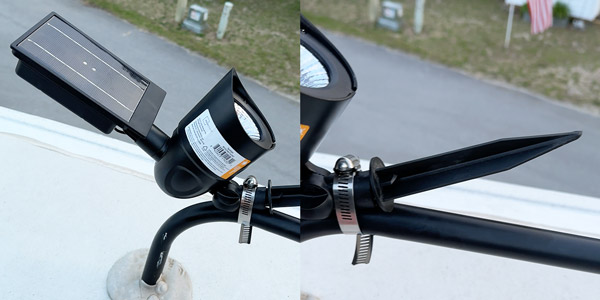
As for mounting the solar light, I just mounted it to a ladder rail on the roof of my RV. I secured another hose clamp around the base of the light and the ladder rail. I also left the stake in the light because it gave it more support at the bottom.
SMALL PROBLEM
Although we love our flag pole, we did encounter a small problem with it right out of the box.
All three clear tabbed brackets you see in the photo below should rotate freely around the pole so the flags can rotate in the wind without getting tangled or stuck.
We found that the top clear bracket wasn’t rotating freely around the flag pole like it was supposed to. This means our flag would not be able to rotate with the wind and would probably get stuck more often.
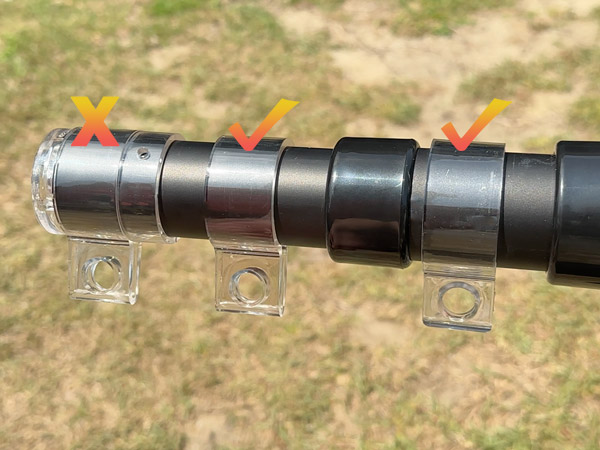
After investigating, we realized the problem was the clear section underneath. It was mounted too close to the top tabbed bracket so they were touching and the top bracket couldn’t rotate freely.
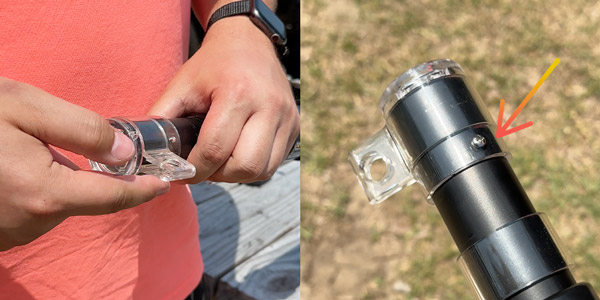
To fix this issue, we simply unscrewed the clear section underneath, drilled a new hole and mounted it slightly lower. This gave the top tabbed bracket more room, allowing it to finally spin freely around the pole.
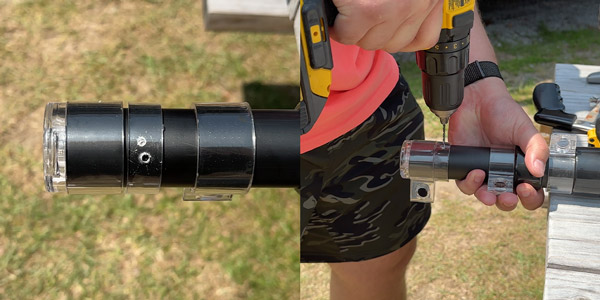
Problem solved!
OTHER FLAG POLE OPTIONS
Yes, there are better solutions to mounting a flag pole to your RV, especially if you’re mobile and will be traveling often. But since we knew we’d be stationary for the next month, plus Flag Day and July Fourth were quickly approaching – we found this to be the quickest, easiest and cheapest way to show our patriotism and add a flag to our RV setup.
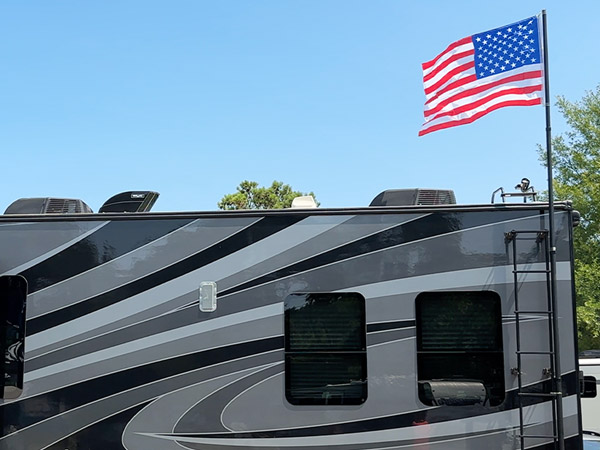
If you’d like to see a quick installation video of this setup, check out the TikTok or Instagram post. Have questions about it? Drop a comment.
If you’re a full time RVer and have experience with other flag pole setups, let me know what’s worked for you and what hasn’t. I plan to upgrade this to a more mobile-friendly setup soon and would love to hear your thoughts!
And remember… Make Every Trip Count.



0 Comments